How-To: Create User Access Token
This guide shows how to create a User Access Token in the Lattica Console or with the Python SDK. Whoever holds the token can send encrypted queries to the model it is assigned to.
Before you start
A token gives access to one model. Create a separate token for each app or person that queries the model, so you can cancel one without affecting the others.
A token created without a model is unassigned. It can't be used for queries until you assign it to a model.
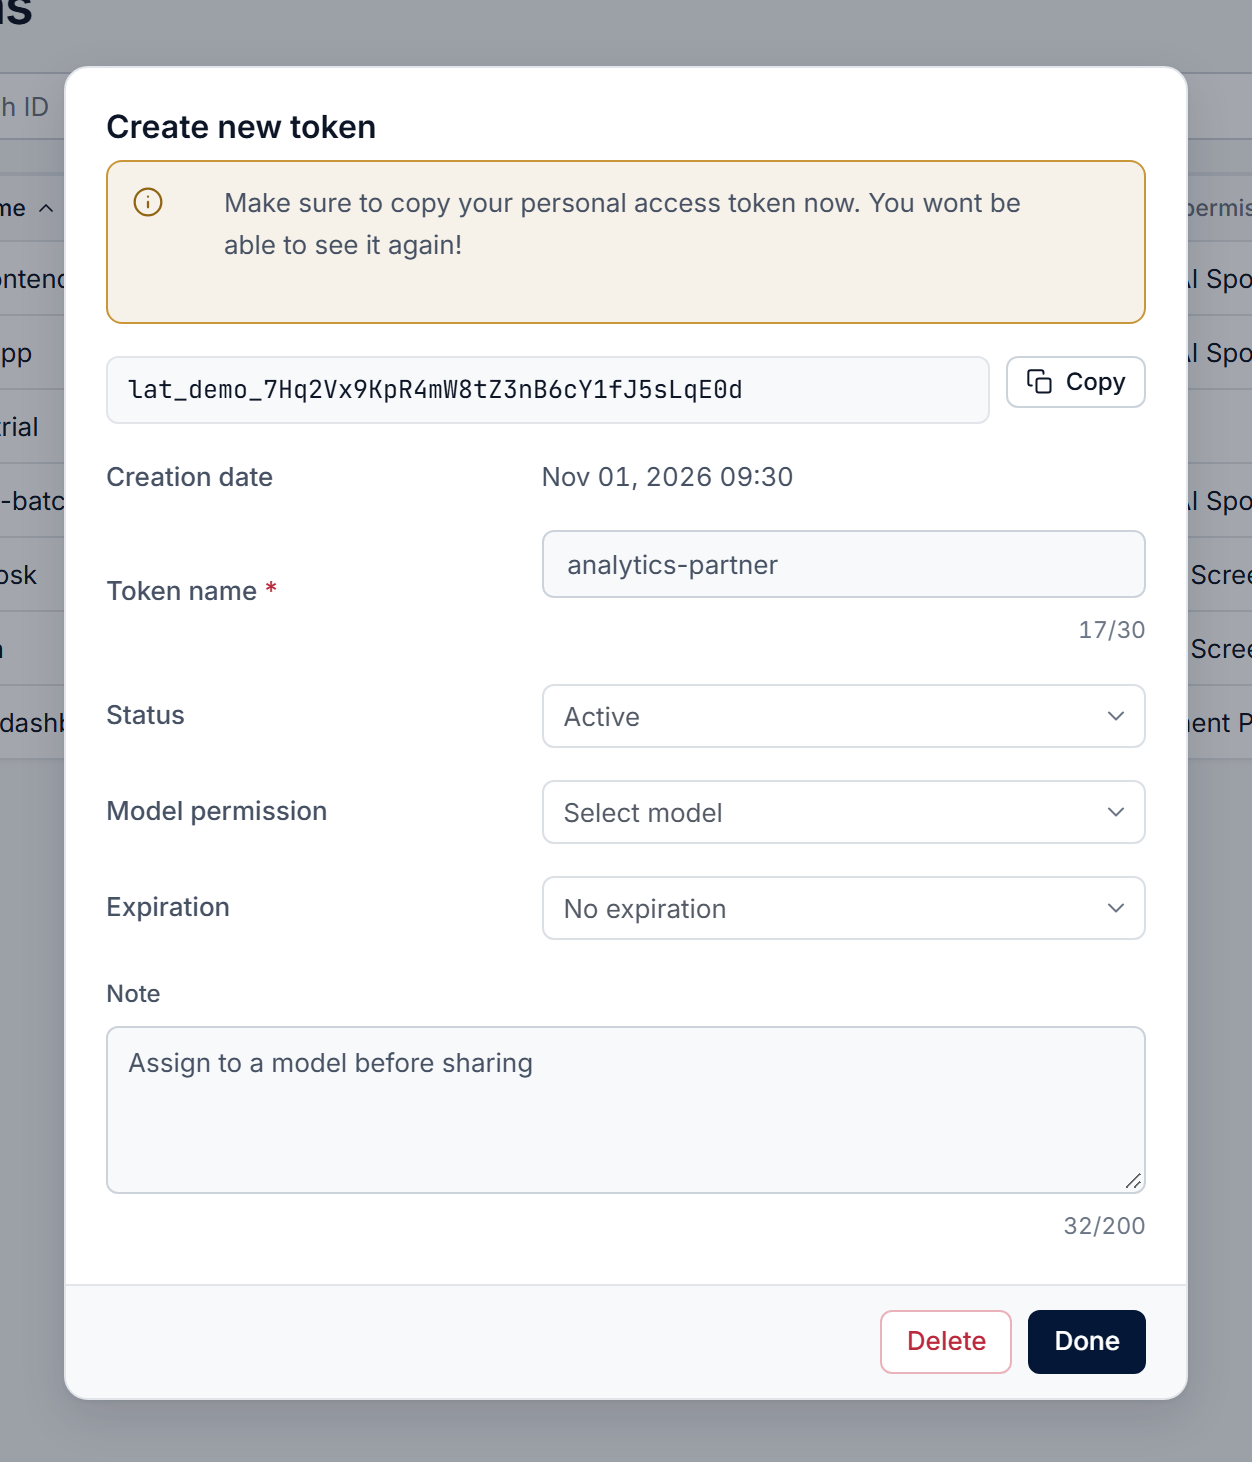
The token value appears only once, right after you generate it. It is not stored, so it can't be shown again.
After creation you can rename a token, change its status (Active, Suspended, Canceled) or modify its settings, and assign it to a model.
The token value is not stored in the system and cannot be retrieved after the dialog closes. If you lose it, delete the token and create a new one.
Token expiration
A token has two separate time limits:
- The expiration you choose. When you create a token, you decide when it stops working: on a set date, or never, so it stays valid until it is canceled.
- The 30-day renewal. Separately, the platform requires every token that is still valid to be renewed every 30 days.
Create a token
Pick the method that fits your workflow. The two Console methods open the same Create new token dialog:
- From a specific model: Start here if you already have a target model in mind and want to create tokens that work with it. The model is automatically pre-filled in the dialog.
- From the Tokens page: Start here if you want to create tokens first and decide later which model to allow them to work with (creating an unassigned token), or to manage all tokens in one place.
After a token is created, it can always be modified, including removing its assignment from a specific model and assigning it to another one.
- Console: for a specific model
- Console: from the Tokens page
- Python SDK
Use this when the token is for a model you already have. The model is filled in for you. In the Console, select Models in the left menu.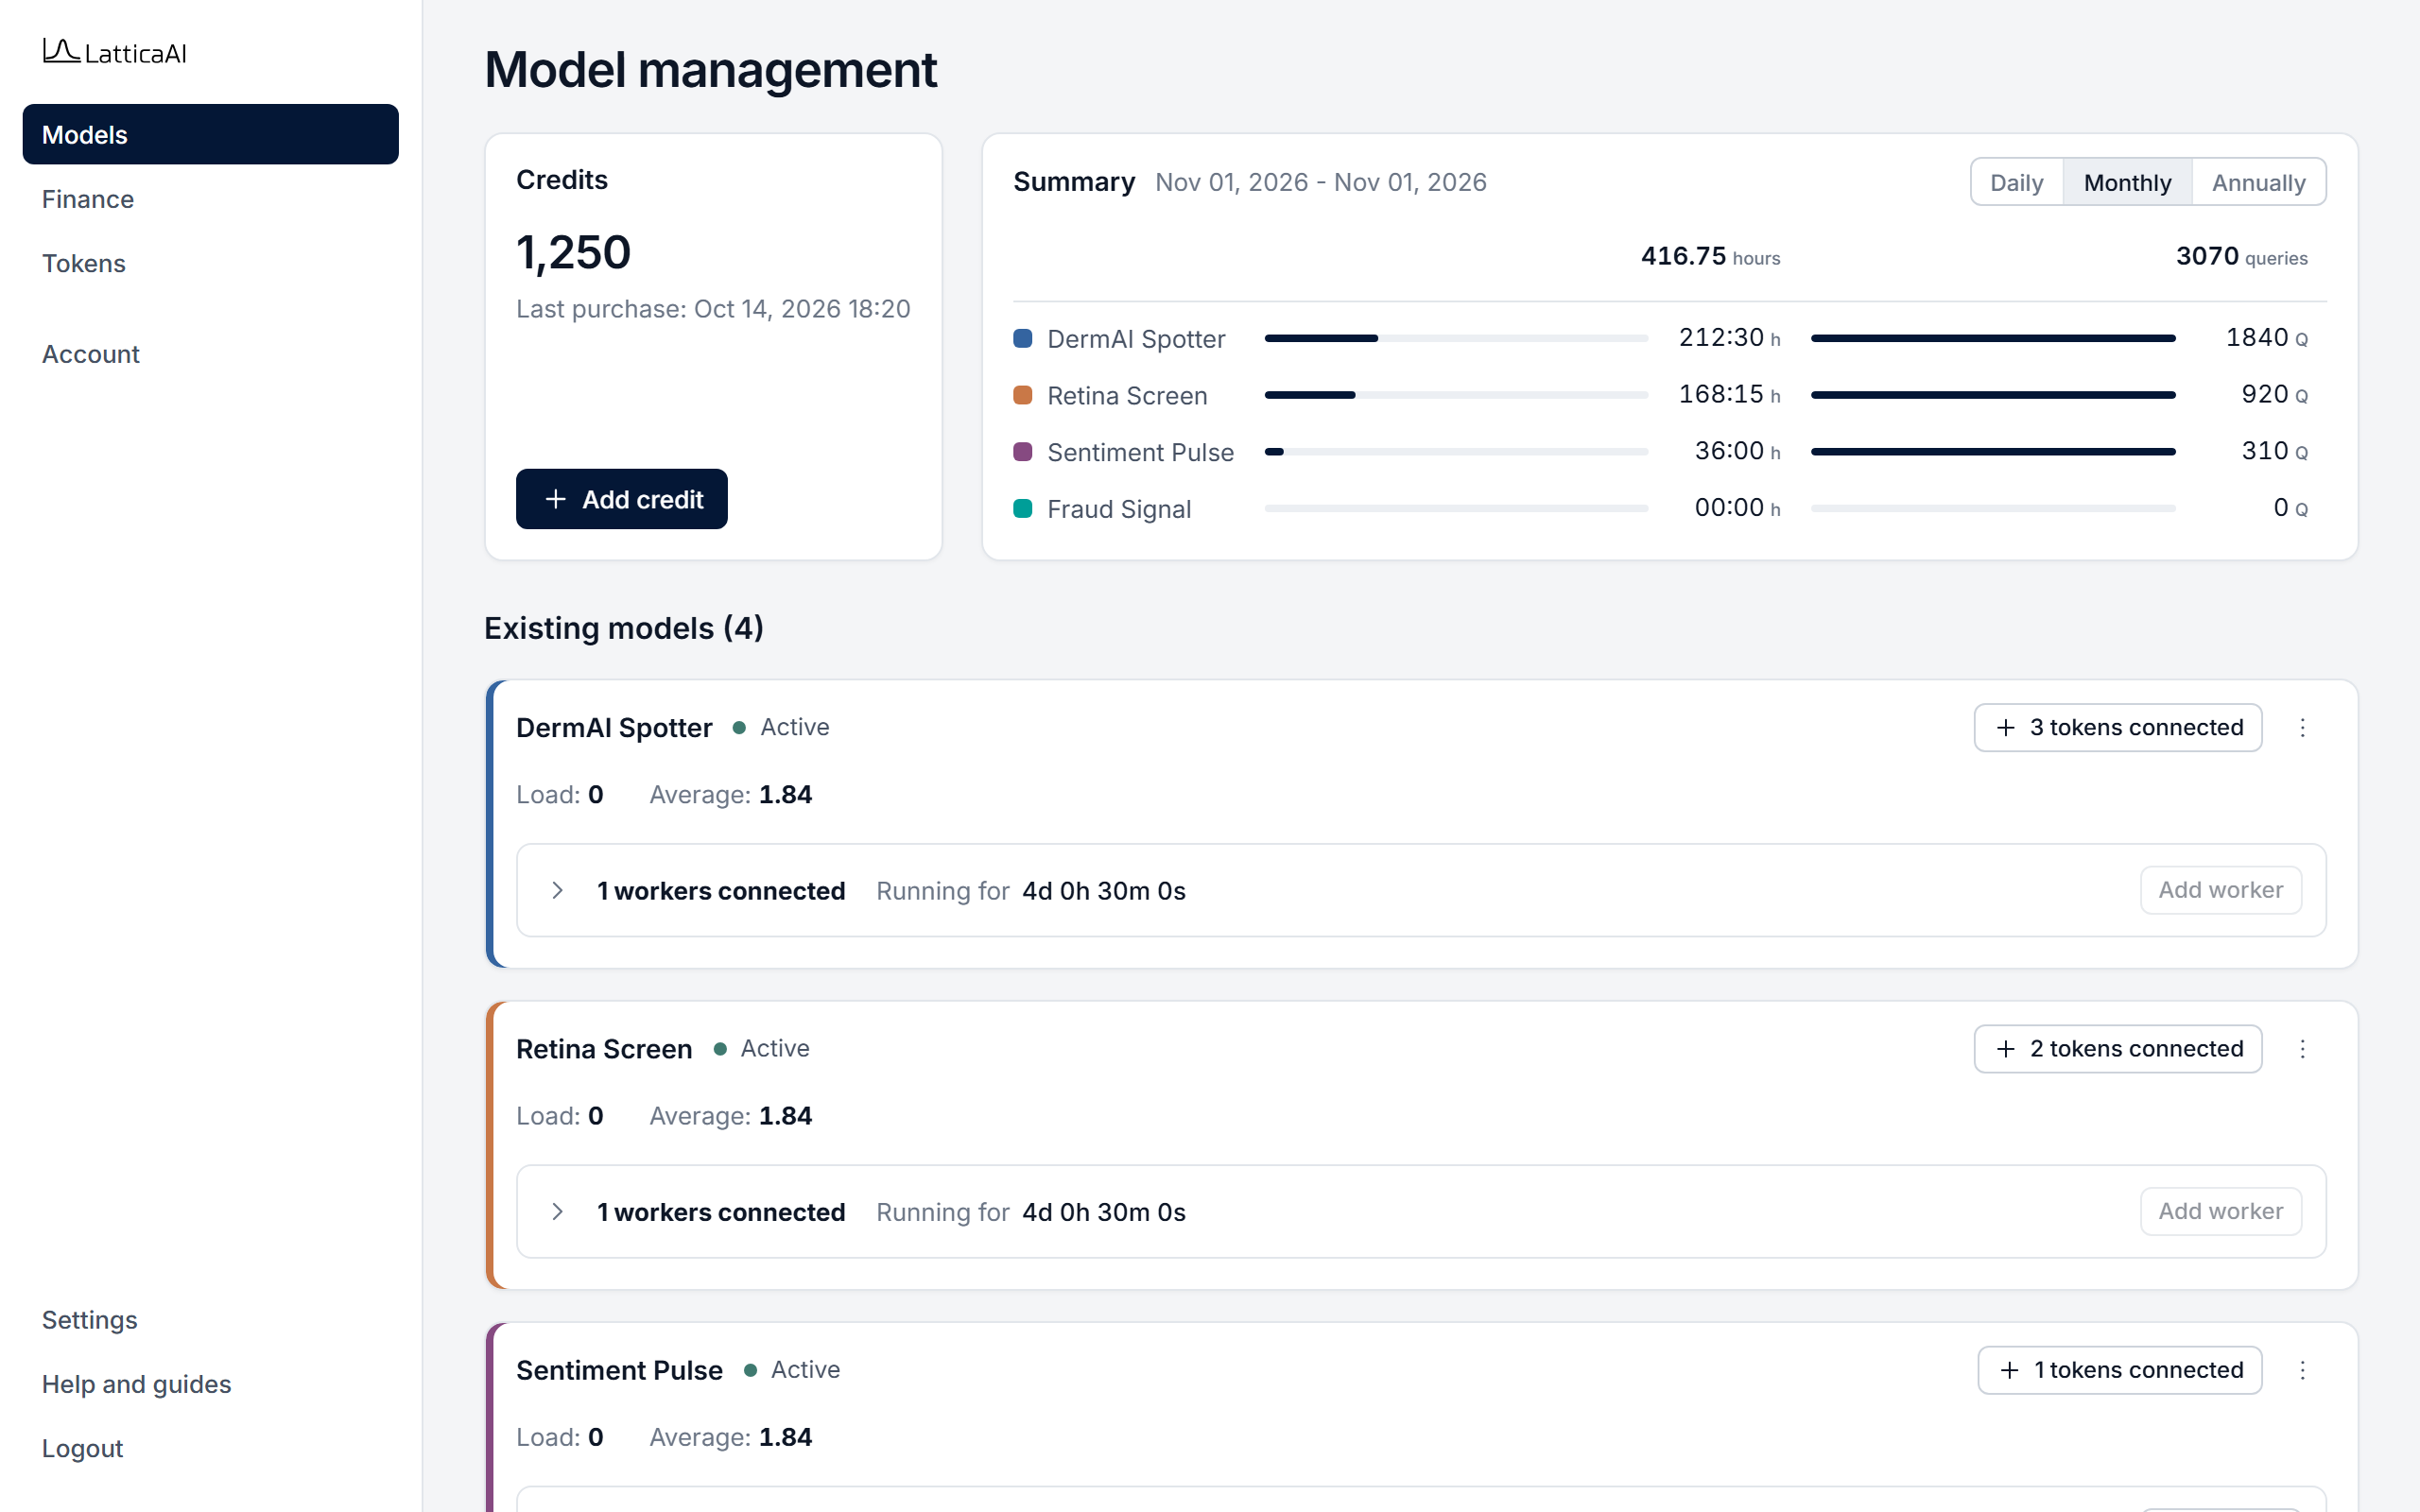
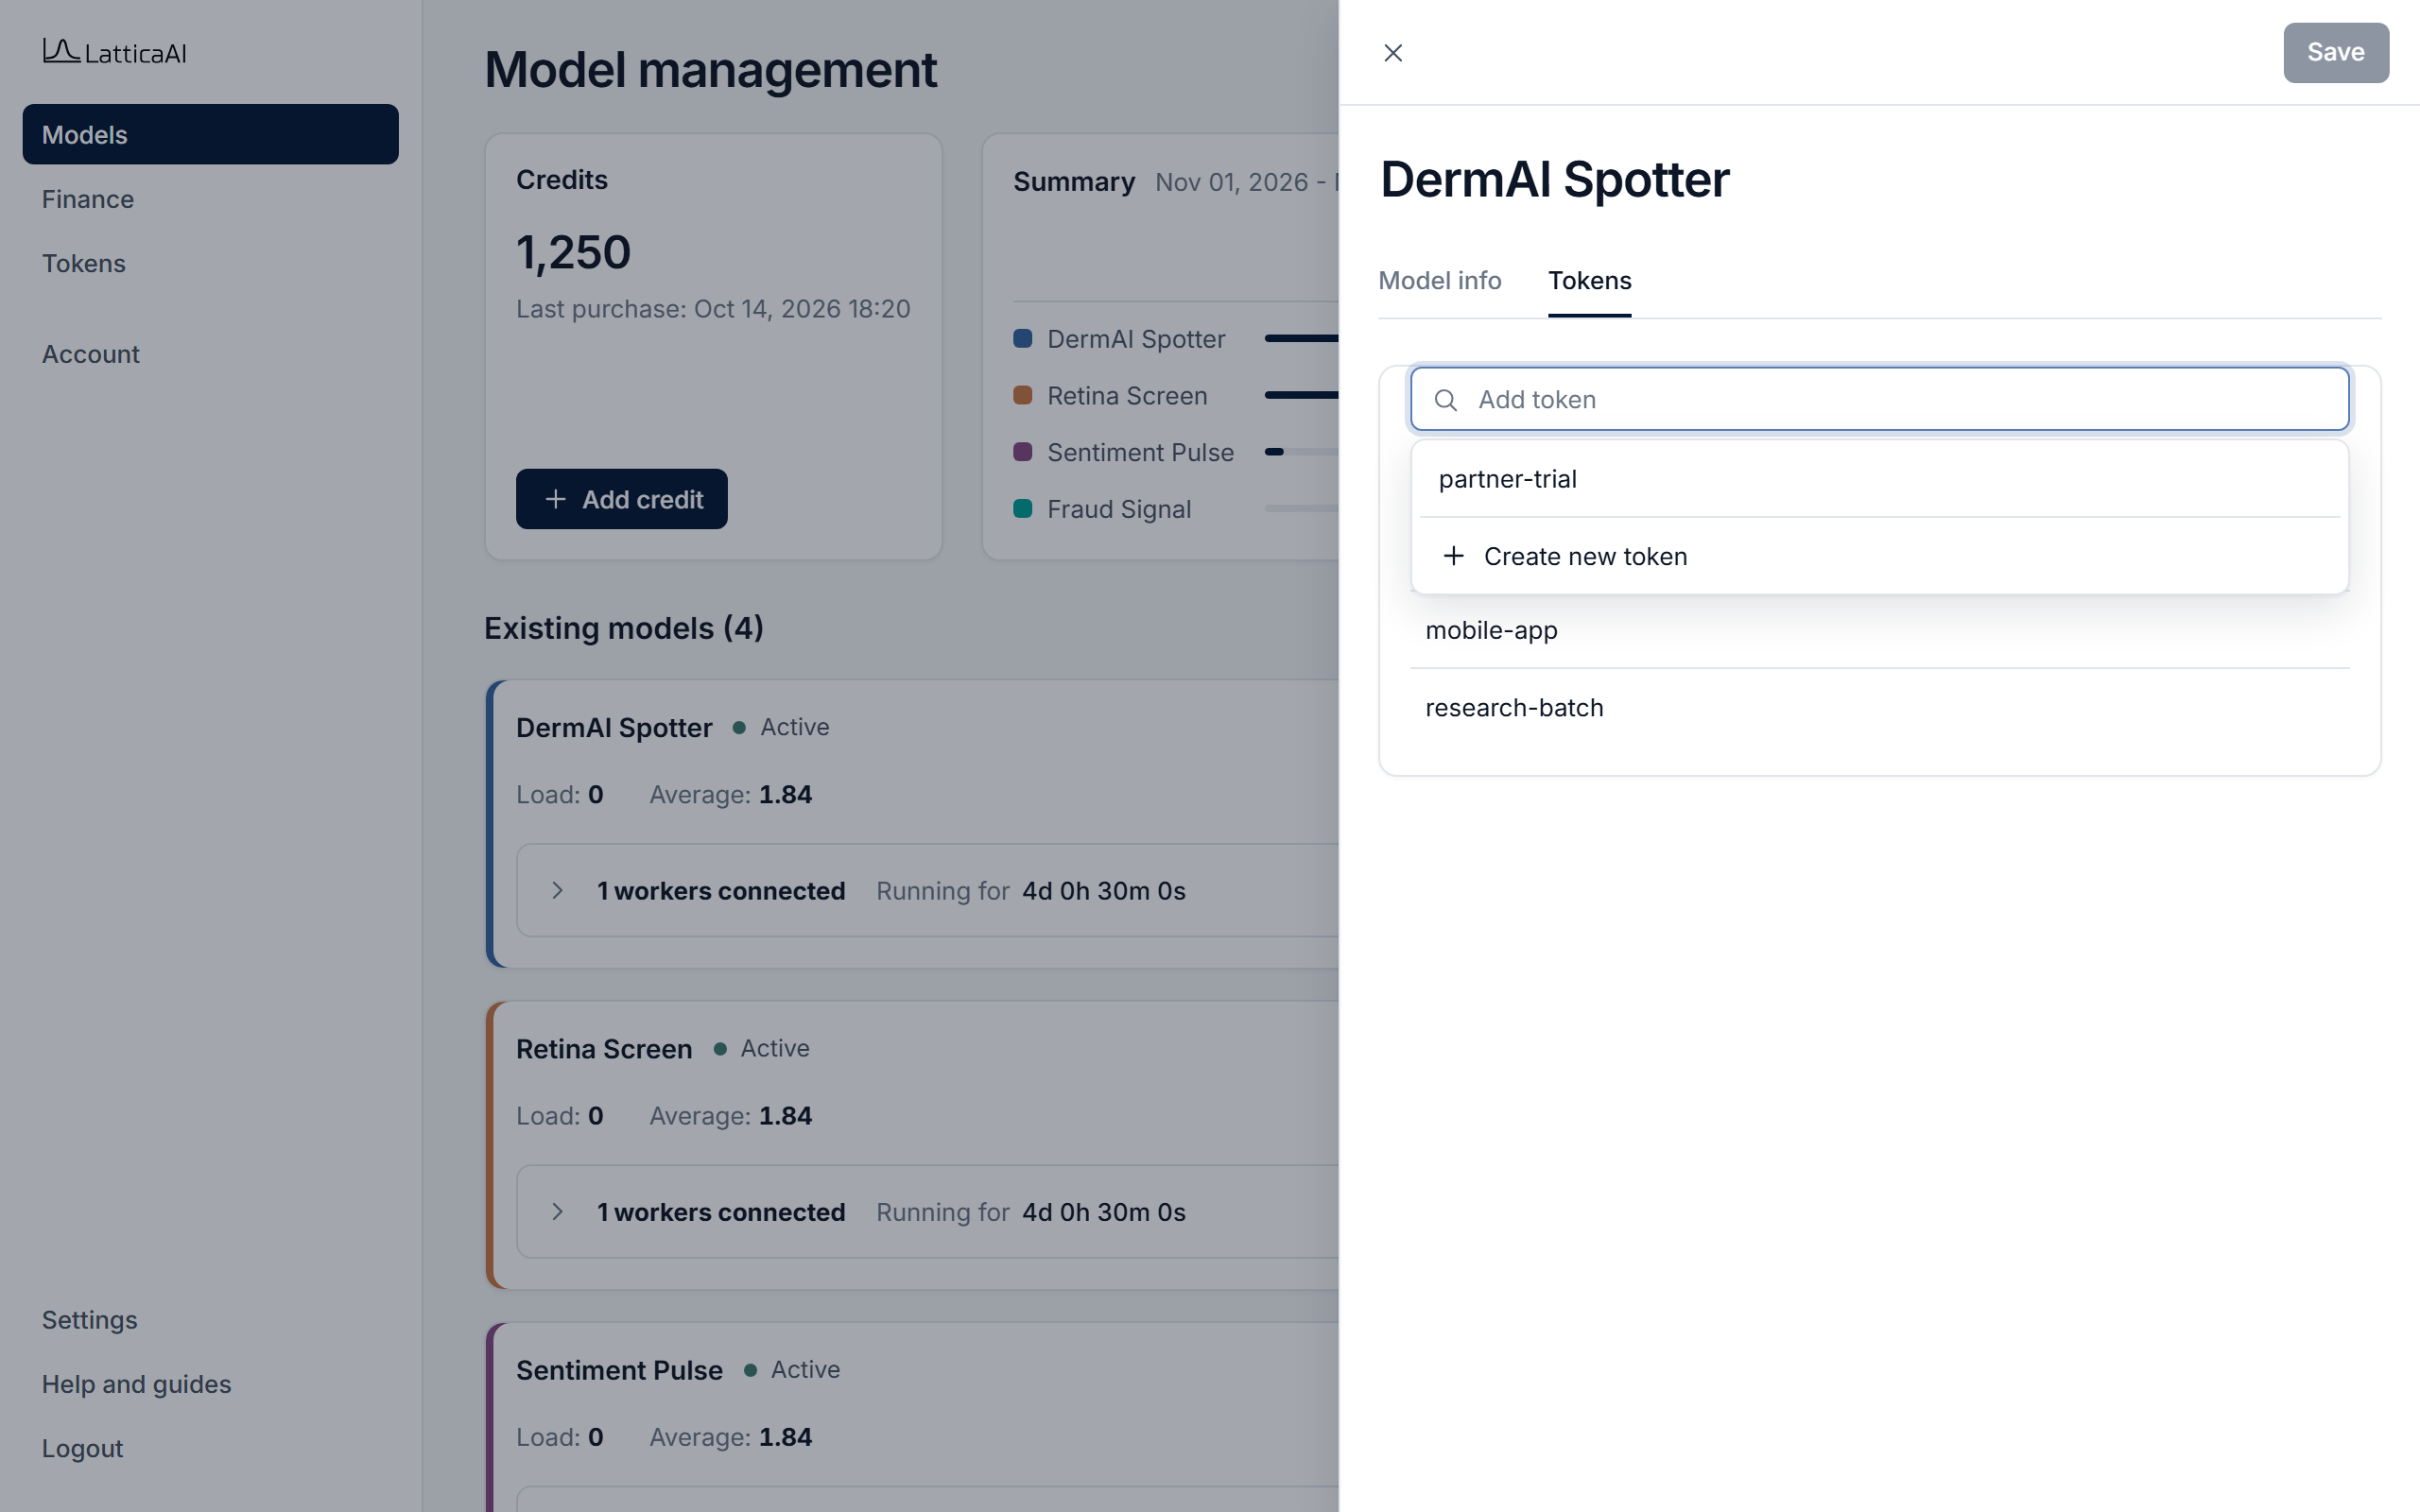
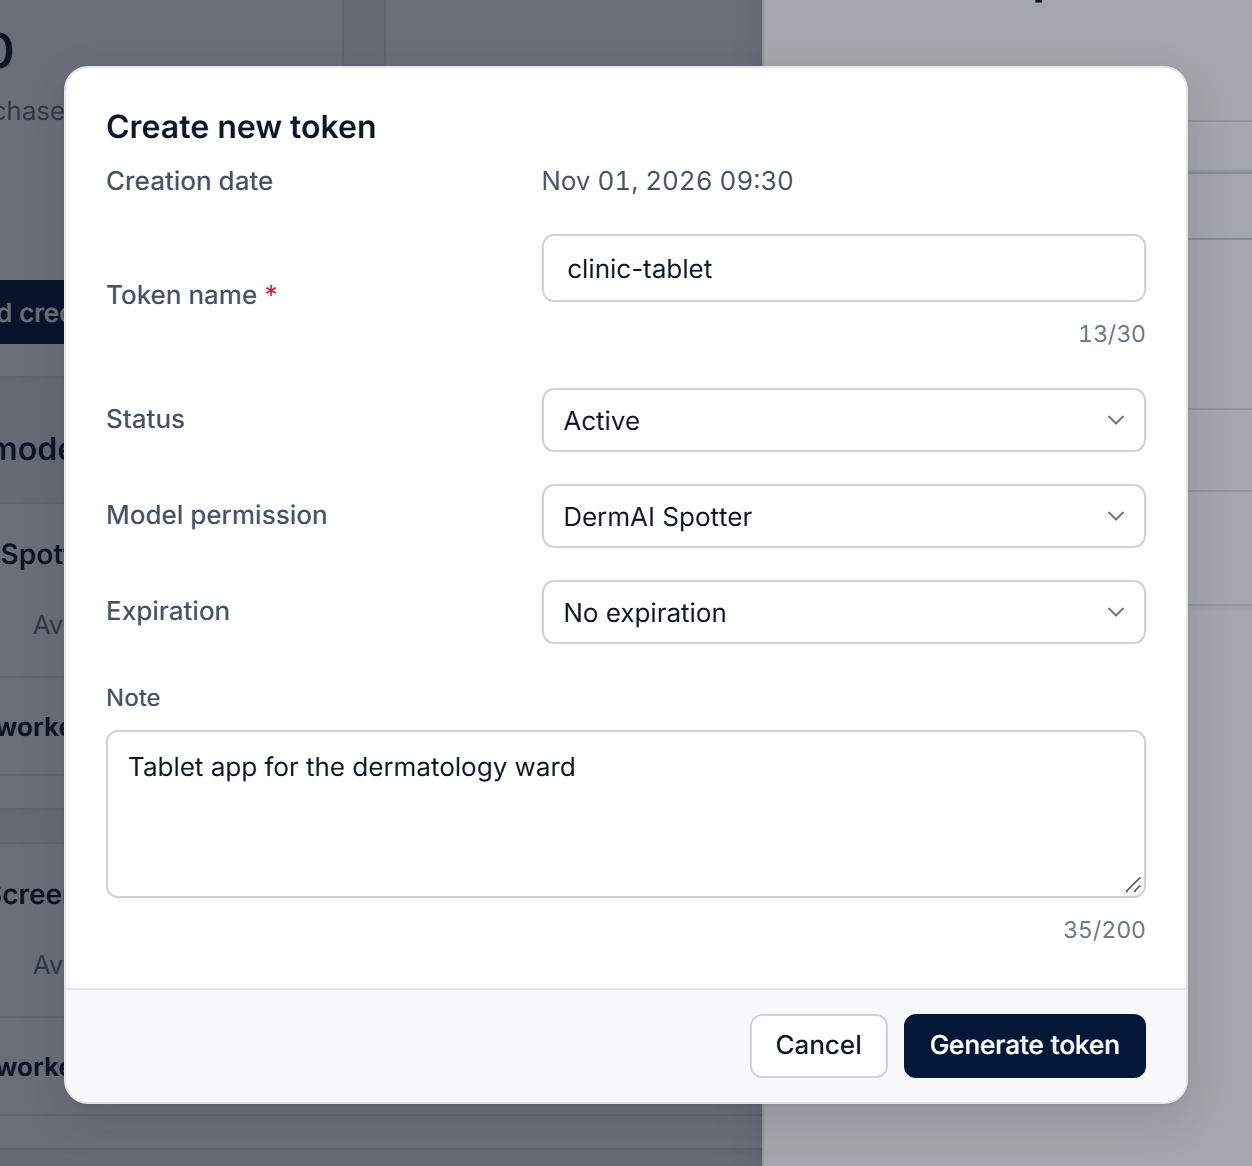
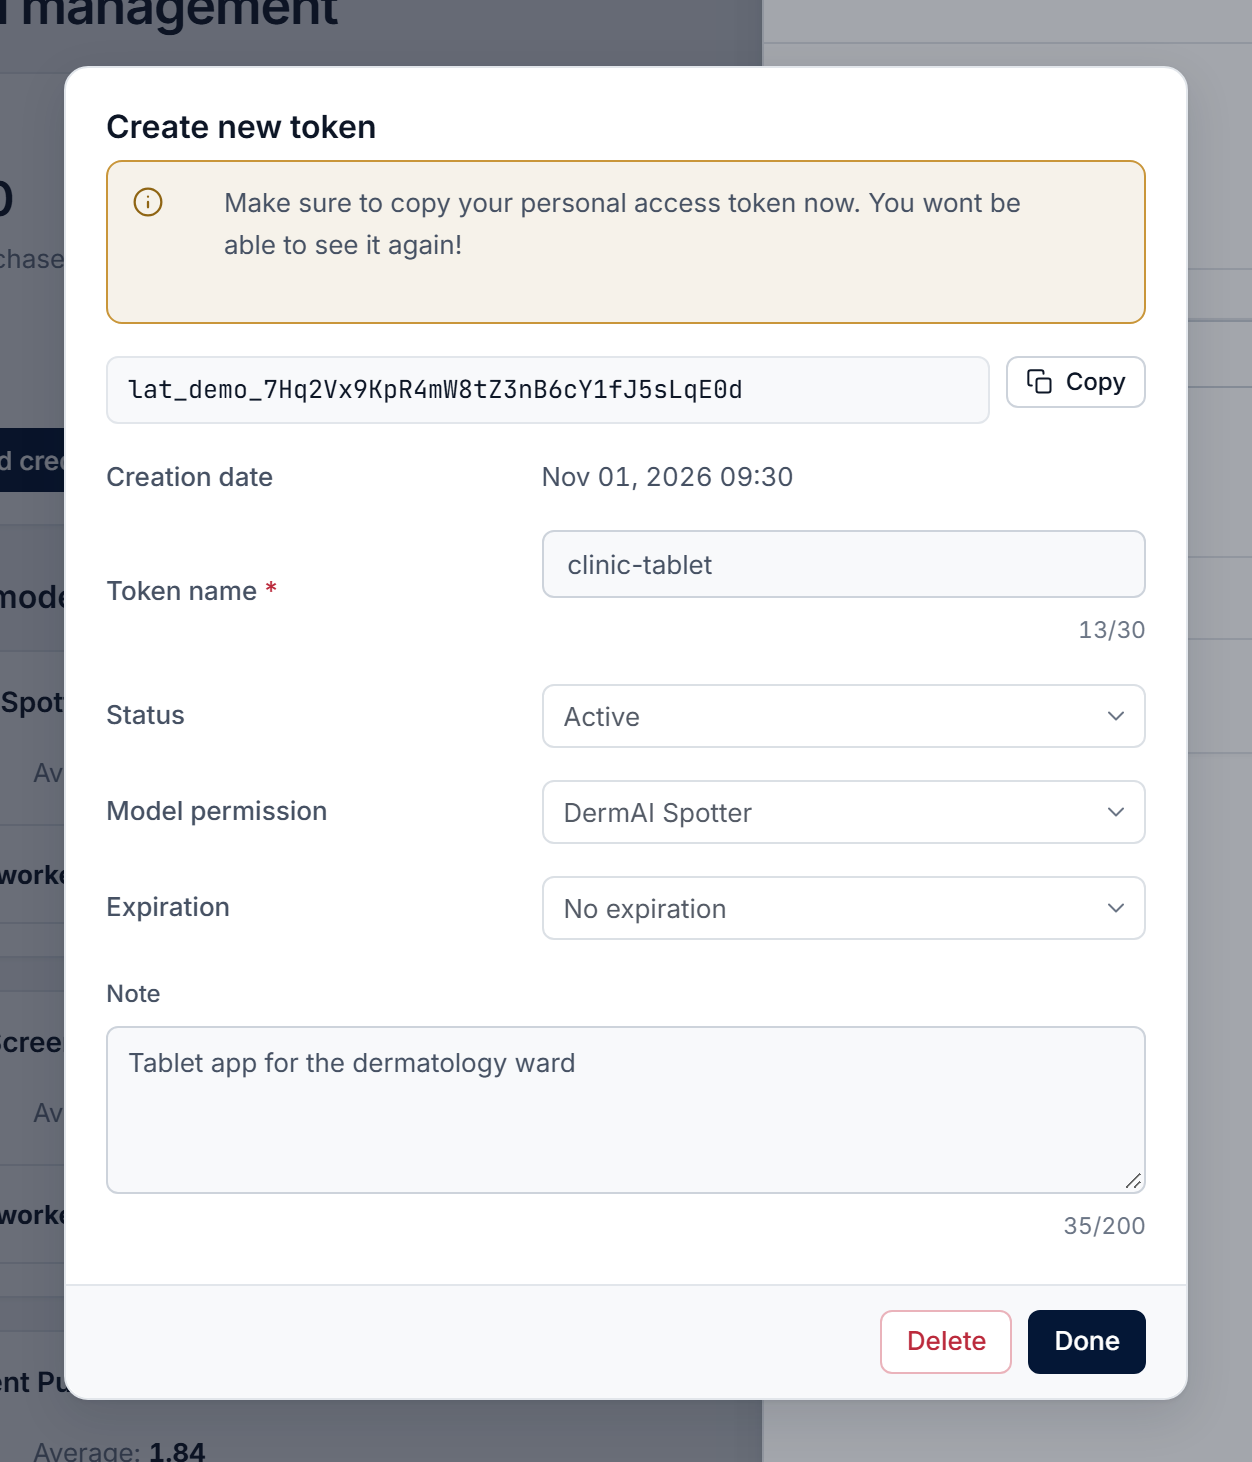
Use this to manage tokens in one place, or to create a token that isn't assigned to a model yet. In the Console, select Tokens in the left menu. The page lists every token with its model, status and expiration date.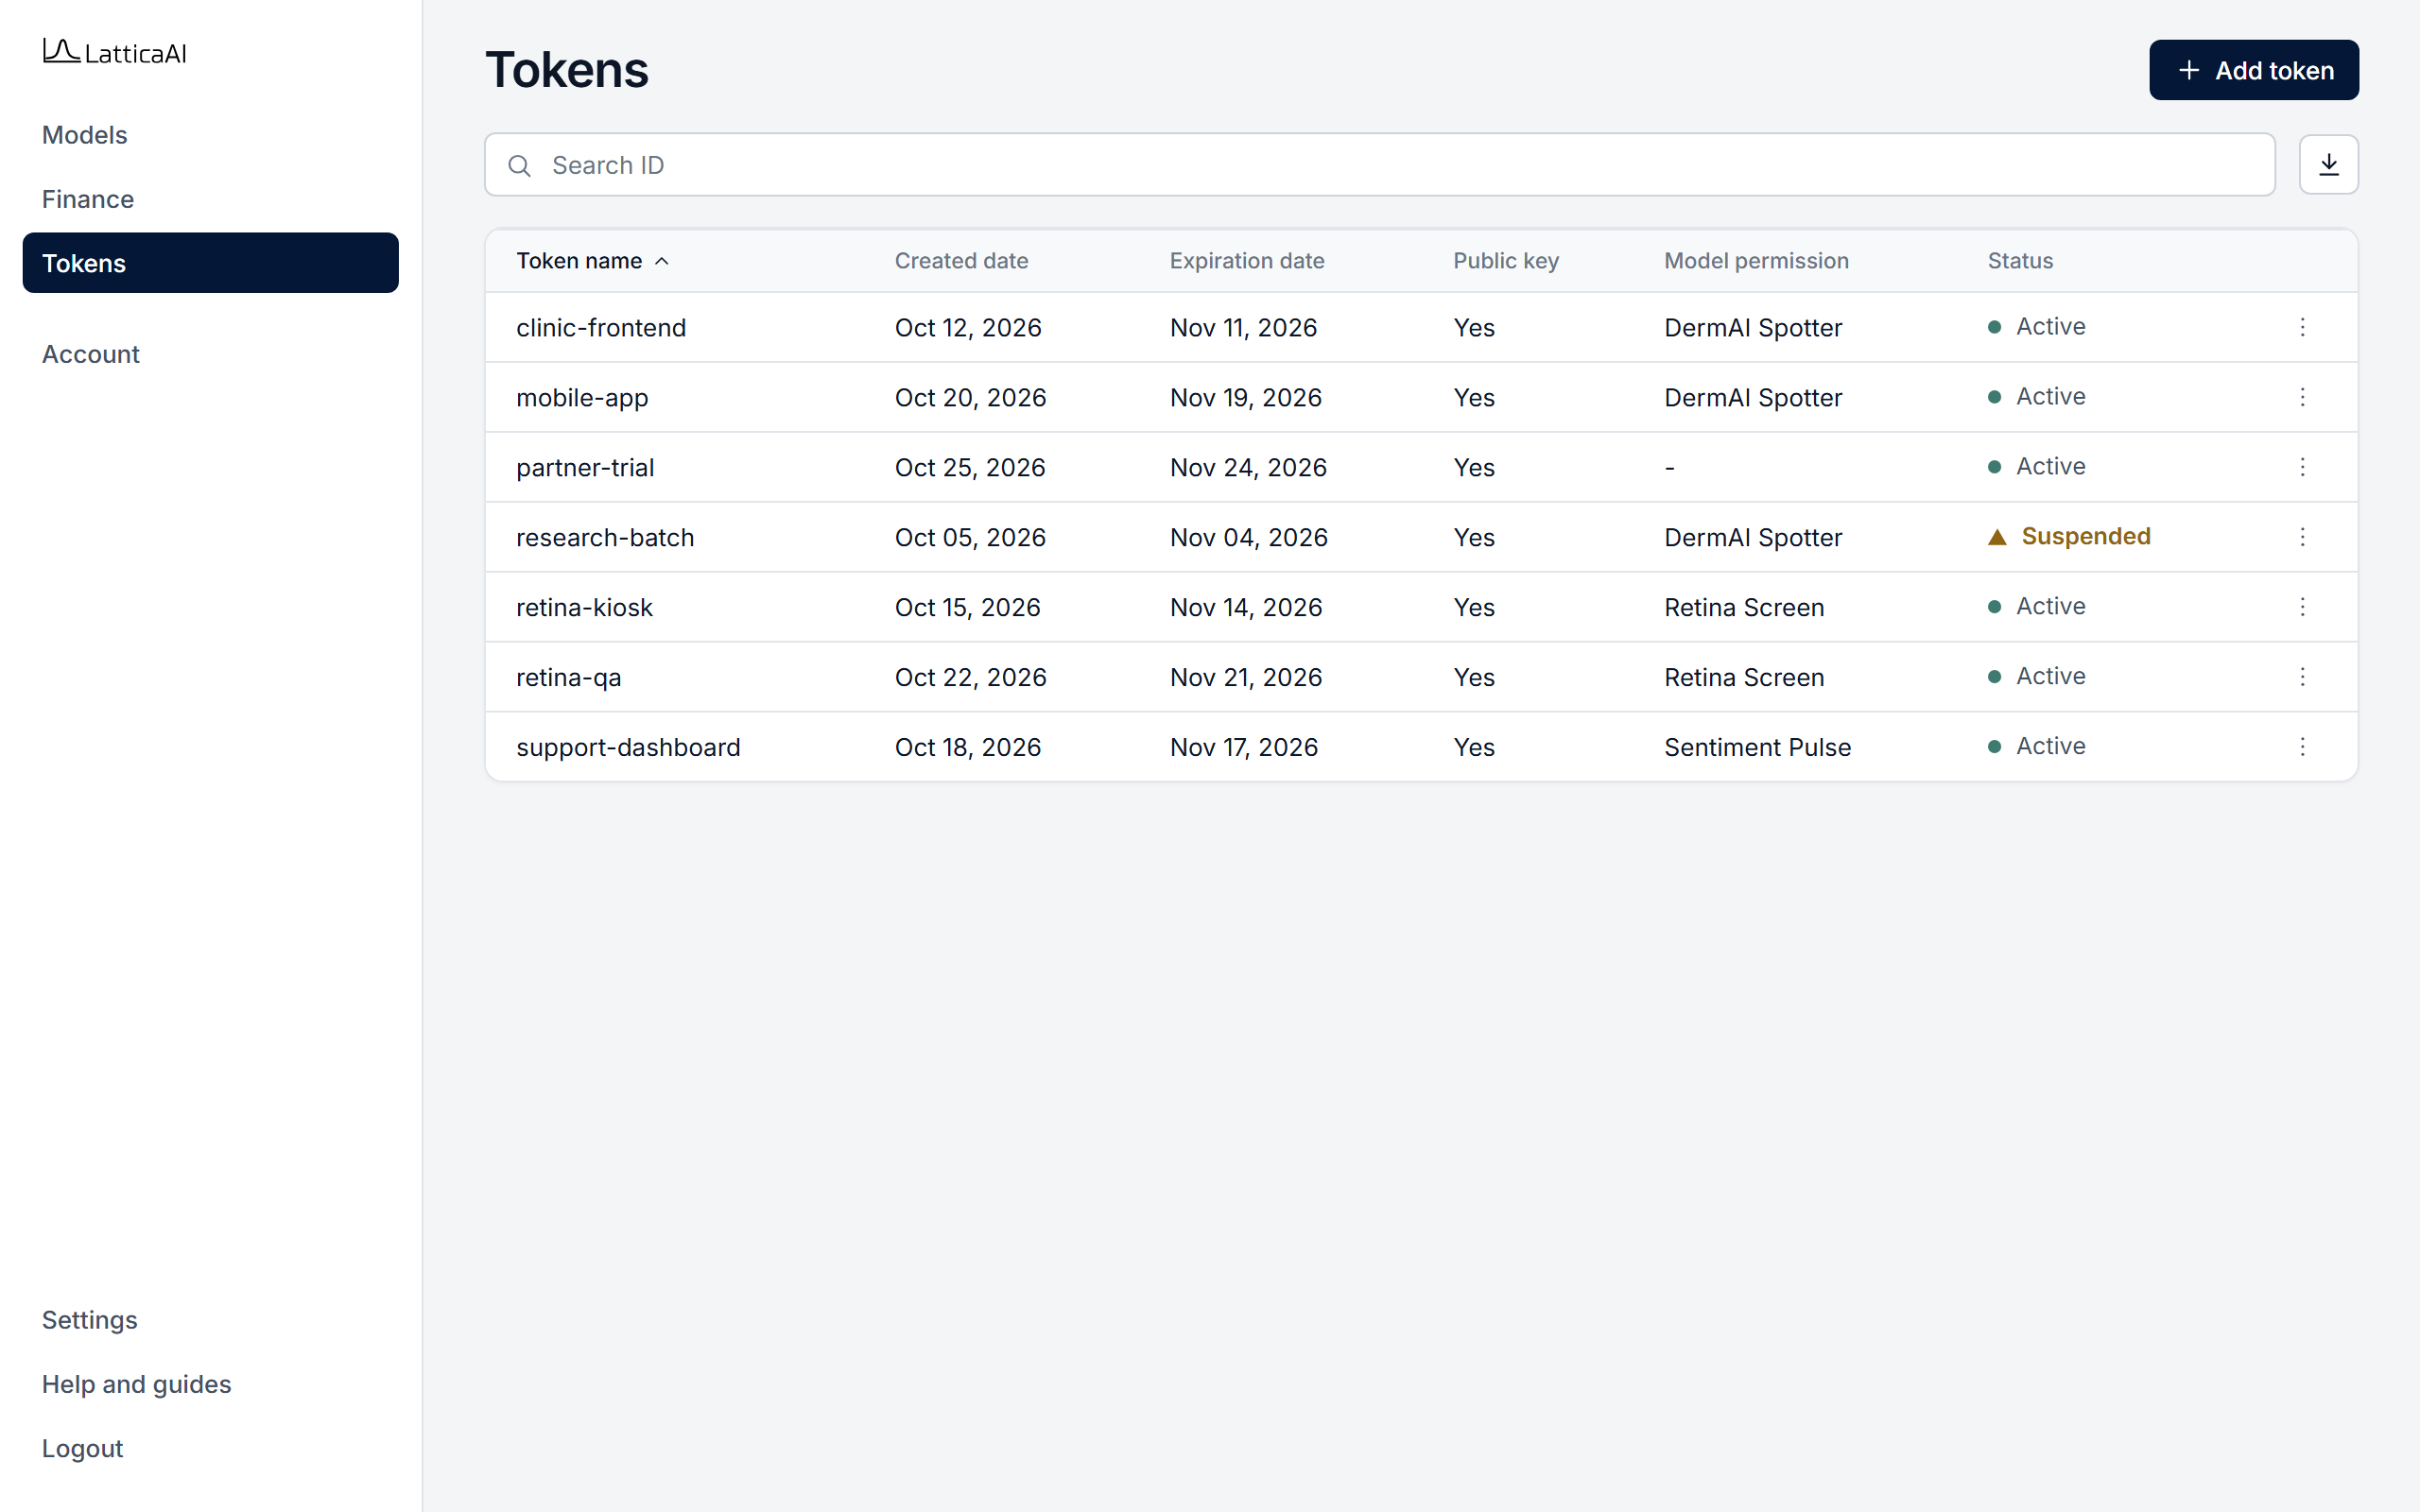
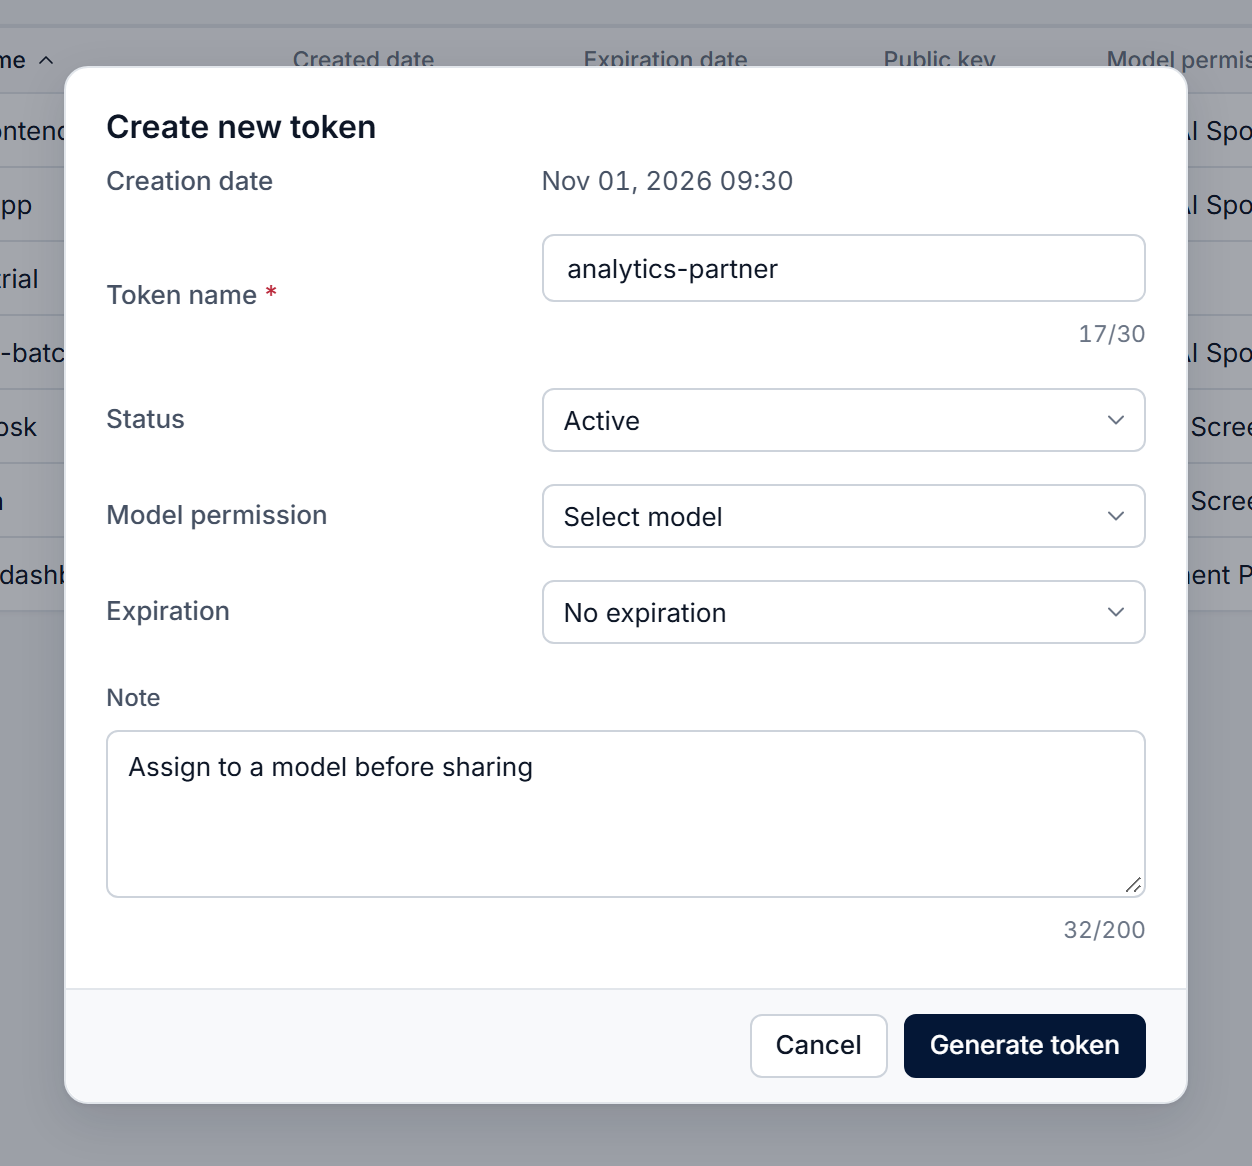
Create a token in code with studio.tokens.create. The SDK needs a model id, so it always creates a token assigned to that model. To create an unassigned token, use the Console.
import os

from lattica_studio import LatticaStudio

# Your License from the Console. Read it from the environment; never hard-code it.
studio = LatticaStudio(os.environ["LATTICA_LICENSE_KEY"])

model_id = "<your-model-id>"  # e.g. the id returned by studio.deploy_pipeline

# save=True keeps a local copy that studio.tokens.load() can read later.
token = studio.tokens.create(model_id, name="clinic-tablet", save=True)

print(f"Created token {token.identity.name} ({token.identity.id})")
# token.value is the secret: give it to your query client, or keep it
# in a secrets manager.
Keep the generated token in a secure place. Anyone who has the value can send queries to the model.