How-To: Modify Workload Settings
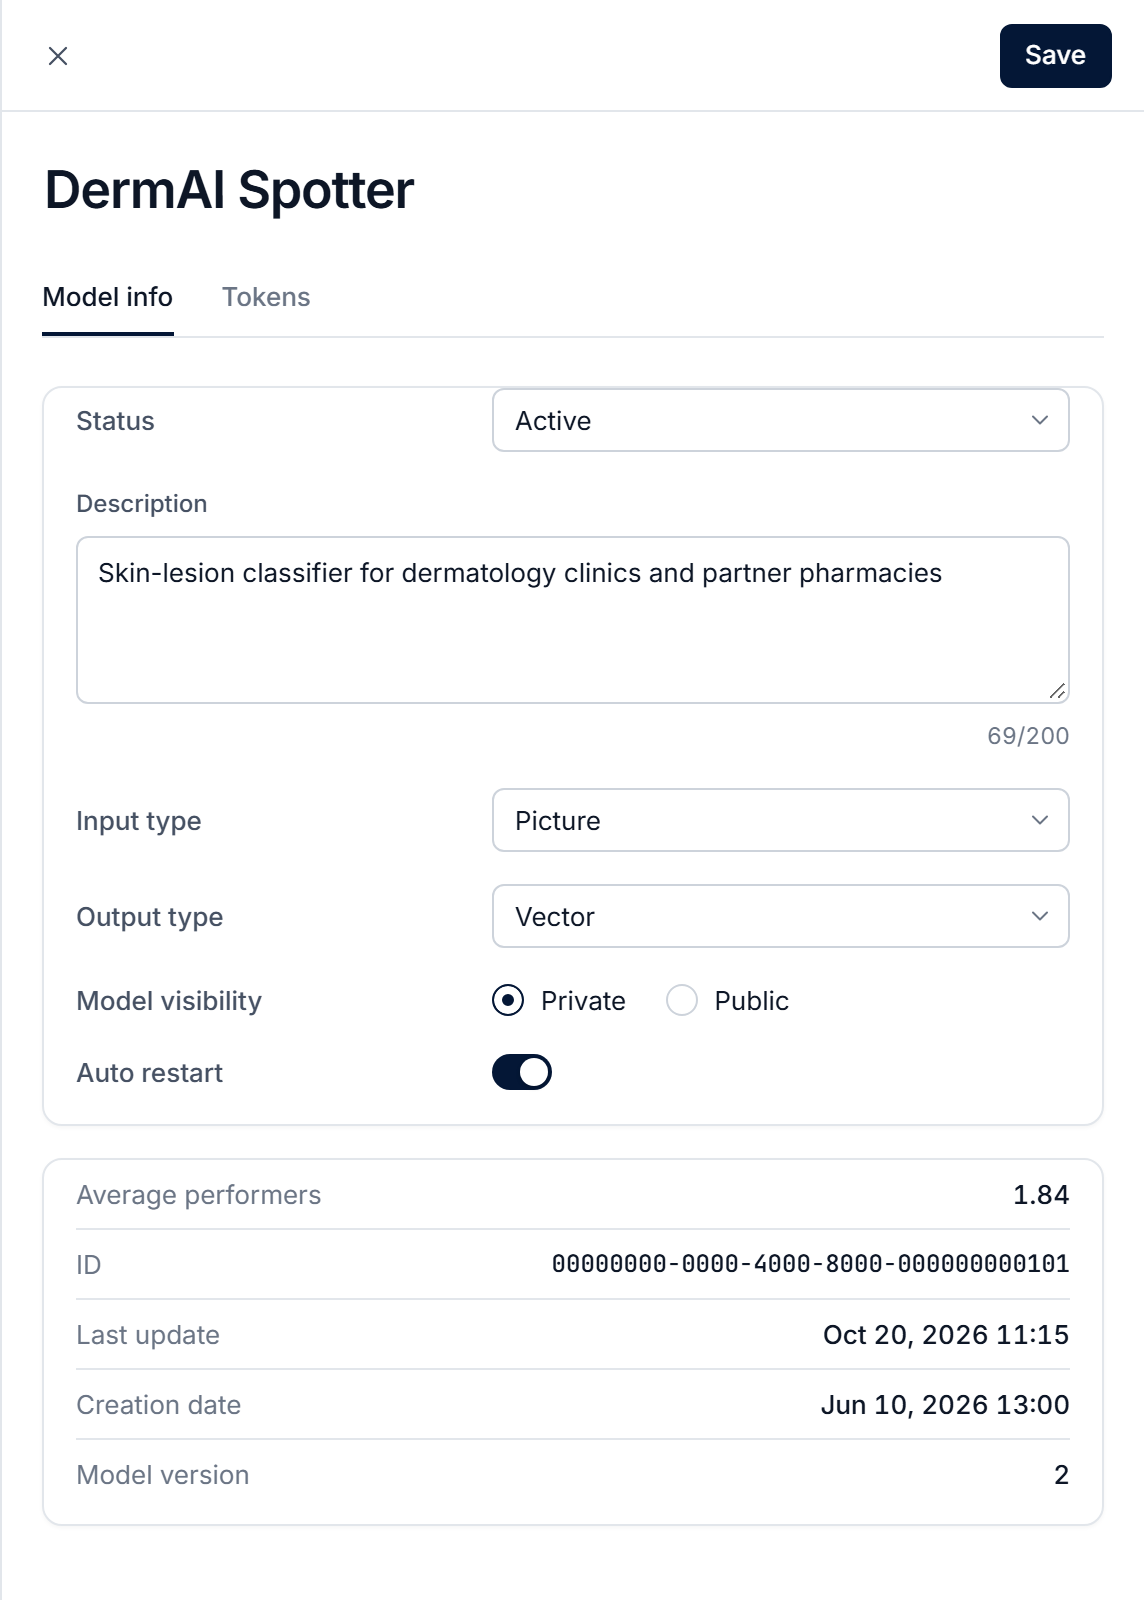
This guide shows how to change a deployed model's settings: its name, status, description, input and output types and visibility. You can do this in the Lattica Console or with the Python SDK.
Before you start
A model is created when you deploy a pipeline with Lattica Studio. See Deploy the Pipeline. Its settings can be changed afterwards.
The Status and the instance type can't be changed while a worker is running on the model. Stop the worker first.
Changes in the Console apply only when you click Save. The button stays disabled until you change something.
Settings you can change
| Setting | Allowed values |
|---|---|
| Name | Mandatory and unique. |
| Status | Active or Inactive. |
| Description | Optional. Free text, up to 200 characters. |
| Input type, Output type | Optional. Text, Picture, Audio or Vector. You can define these if you want to use our demo to present your model. This is not automatic and must be discussed with us first. |
| Model visibility | Private or Public. See Model visibility below. |
These details are shown for reference and can't be edited: ID, Creation date, Last update, Model version and Average performers (the average query processing time).
Model status
- Active: the model is ready, and workers can be started for it.
- Inactive: the model is switched off. An Active model can be set to Inactive, and back to Active, as long as no worker is running on it.
- Uploaded: a legacy status.
The Status list offers only the statuses you can move to from the current one. The others are shown but can't be selected.
Model visibility
- Public: Users you invite can query the model. Access is open to your audience, so it is easy to share and onboard people, but you have less control over individual users.
- Private: Users you invite also need an access token issued by you, the owner. This gives you control over who runs queries against your model, and lets you revoke access for one user without affecting the others. It is useful for sensitive or proprietary models, and it helps with billing and auditing.
Change the settings
- Console
- Python SDK
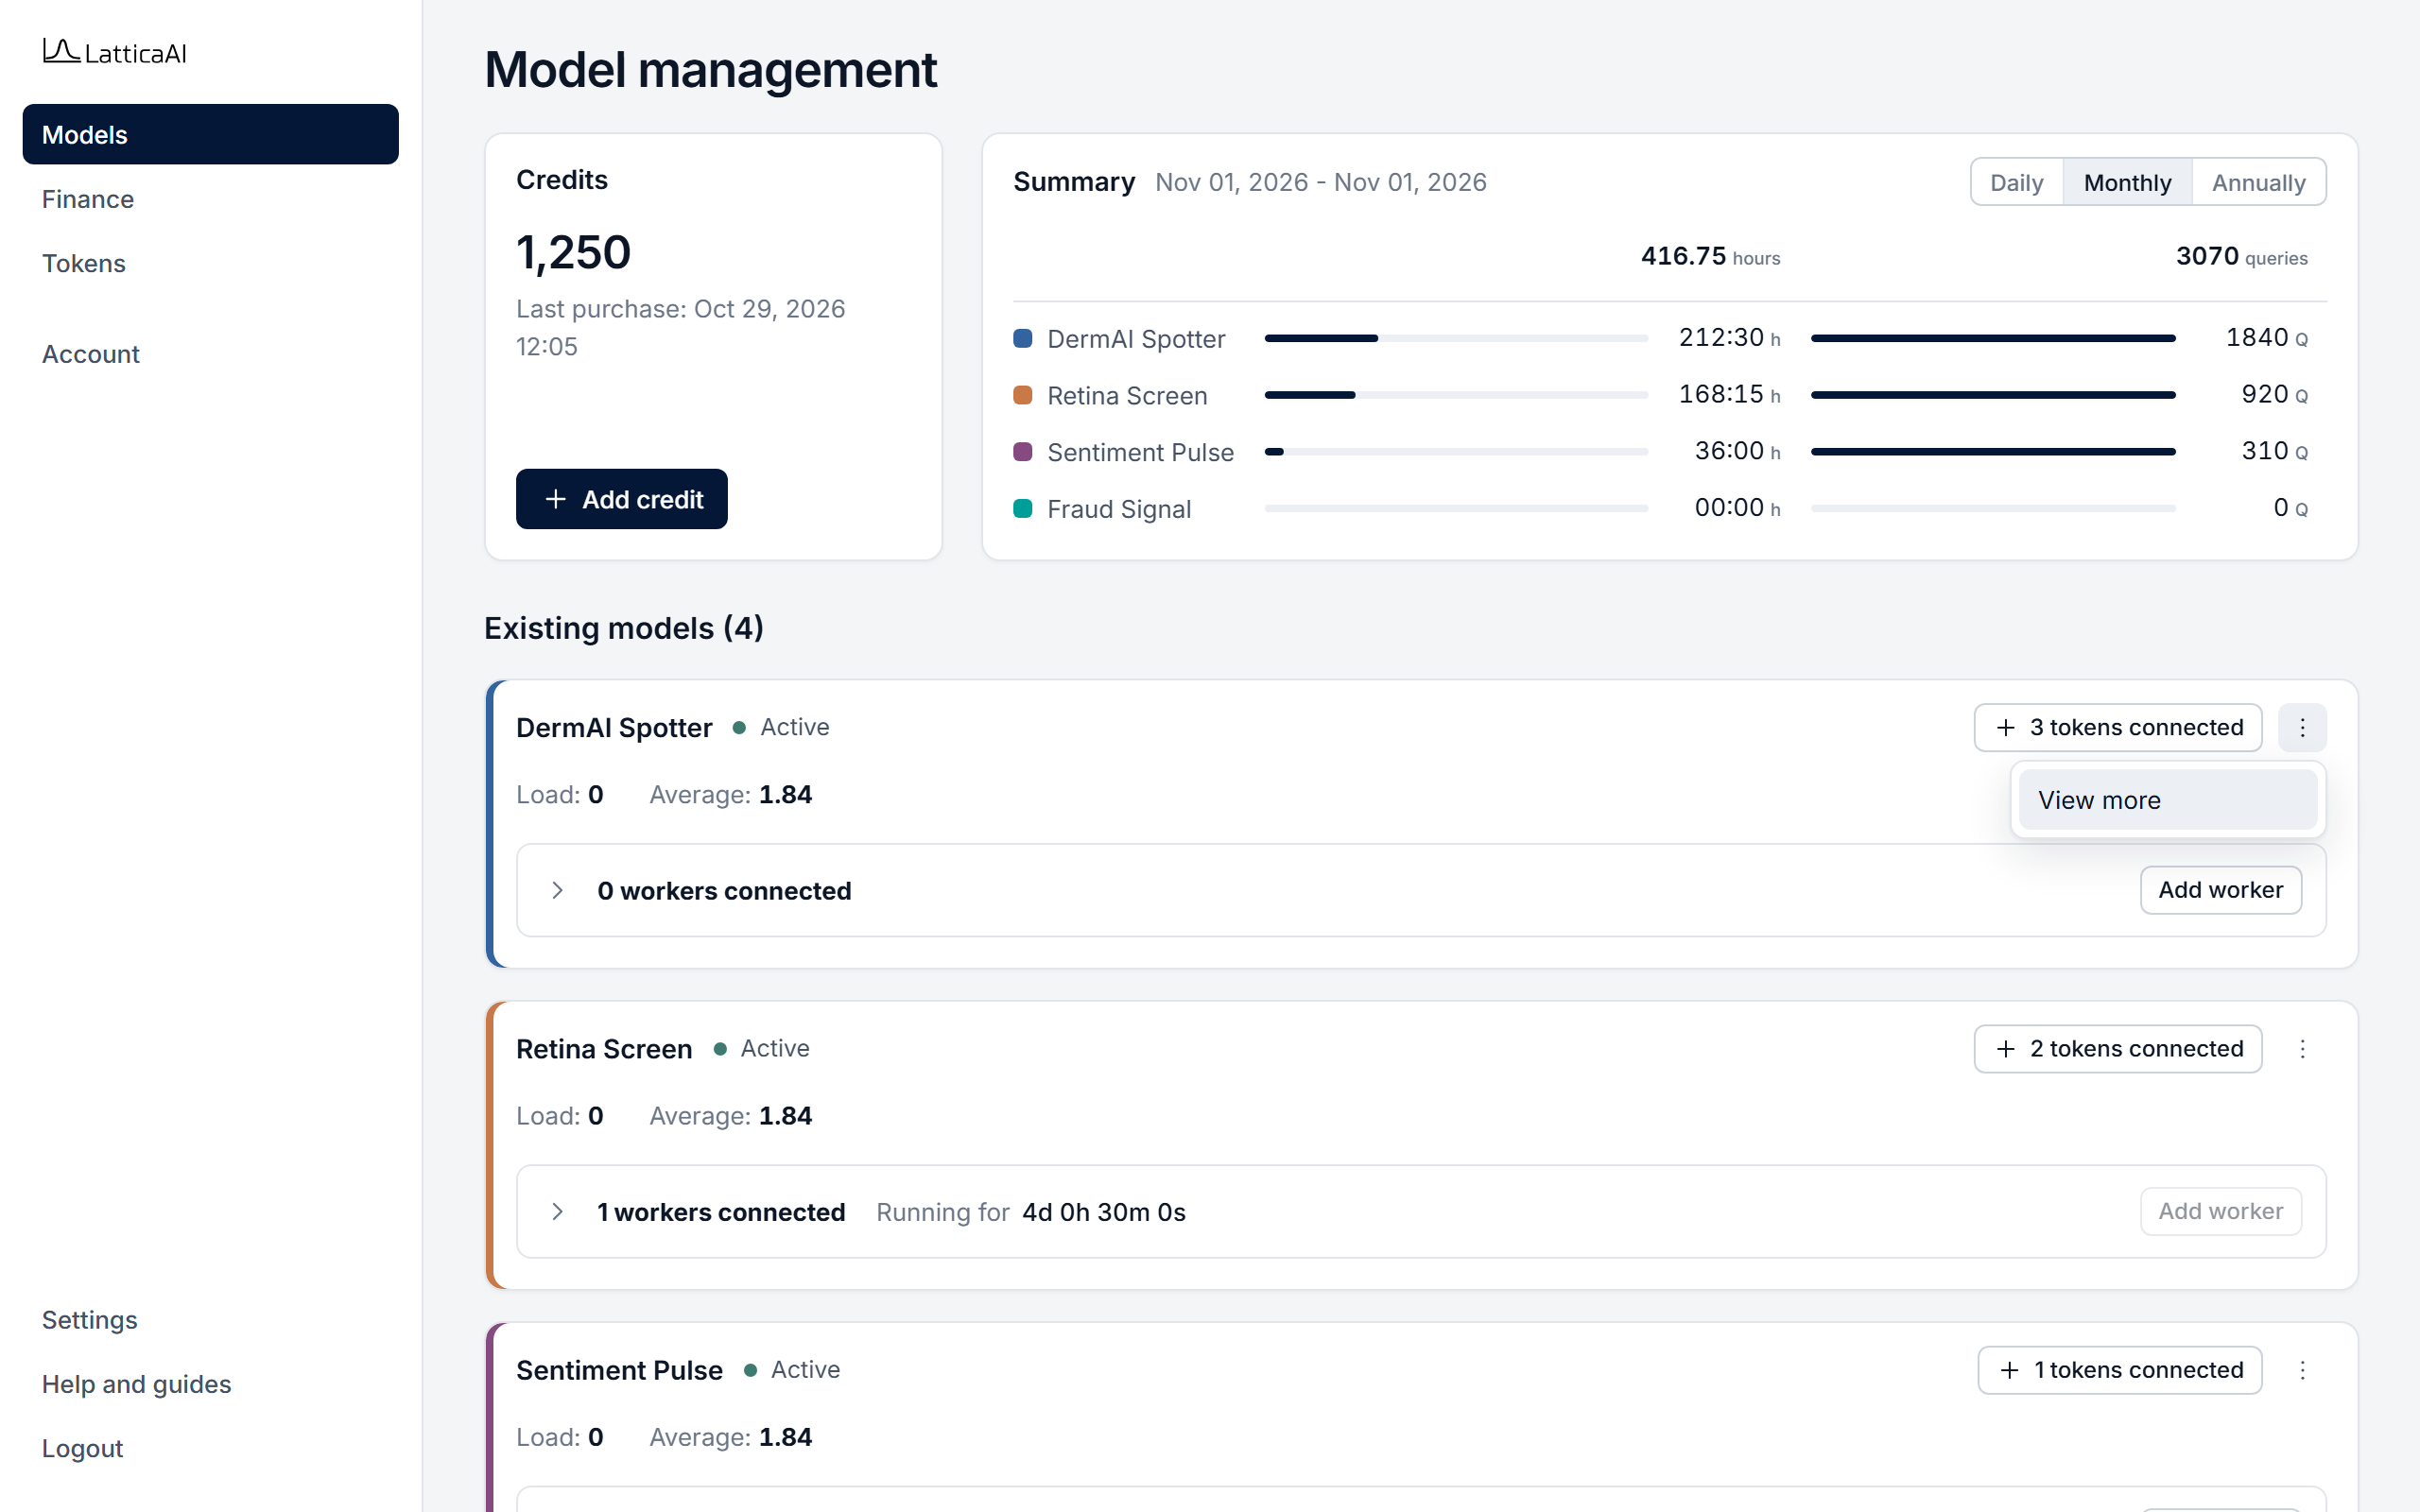
In the Console, select Models in the left menu.
Change settings with studio.models.update. Pass only the settings you want to change. The others keep their current values.
import os

from lattica_studio import InstanceType, LatticaStudio

studio = LatticaStudio(os.environ["LATTICA_LICENSE_KEY"])

model = studio.models.get_by_name("DermAI Spotter")

result = studio.models.update(
    model.id,
    description="Skin-lesion classifier for dermatology clinics",
    input_type="PICTURE",
    output_type="VECTOR",
    visibility="PRIVATE",
)
print(result["message"])

# SDK only: move the model to another instance type (no worker may be running).
studio.models.update(model.id, instance_type=InstanceType.G7E_2XLARGE)
The instance type is changed with instance_type= in the SDK. It isn't shown in the Console. To switch a model off or on, you can also use studio.models.deactivate and studio.models.activate.